
23 December 2020 Update: Let’s Encrypt decided this wasn’t a smart idea, and extended the expiration date until 2024. So, for this immediate scenario, these instructions are no longer necessary. However, I will leave them up for people who are interested in the details of how to add a certificate authority to Android.
On January 11, 2021, Let’s Encrypt will begin issuing certificates that are not cross signed by any other CA by default. This is a good move, but it does cause some consternation for older version of Android.
Some software that hasn’t been updated since 2016 (approximately when our root was accepted to many root programs) still doesn’t trust our root certificate, ISRG Root X1. Most notably, this includes versions of Android prior to 7.1.1. That means those older versions of Android will no longer trust certificates issued by Let’s Encrypt.
Don’t even get me started about how hard it is to get modern versions of Android onto older hardware that is otherwise still perfectly good.
In the article, Let’s Encrypt mentions a number of mitigations for this problem, including the following:
If you’re on an older version of Android, we recommend you install Firefox Mobile, which supports Android 5.0 and above as of the time of writing.
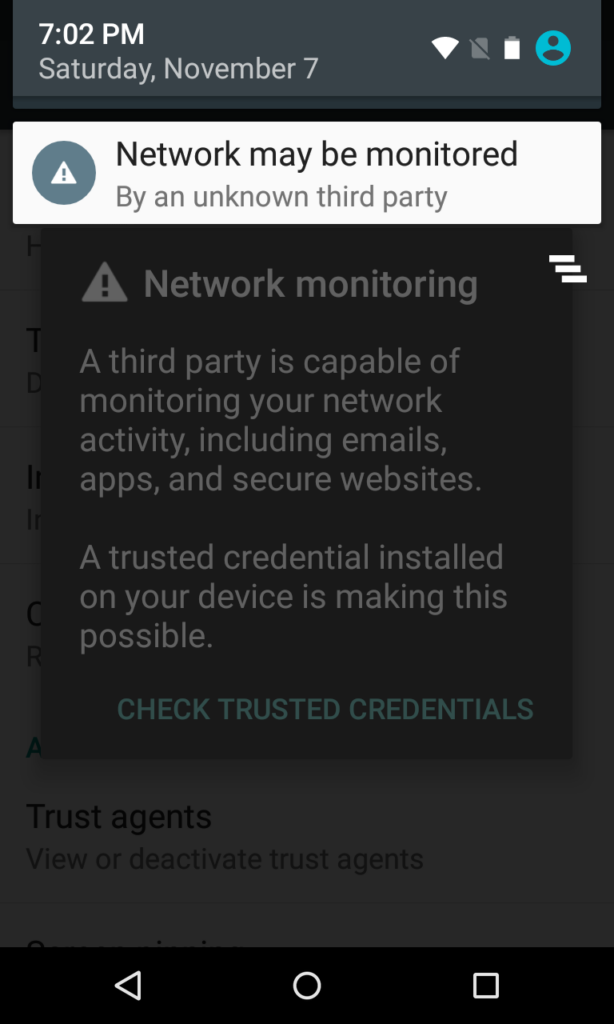
That works because Firefox ships their own list of trusted certificate authorities inside their app. Curiously, they failed to mention that users can also just import the ISRG Root X1 certificate into the trusted store of their OS, which will fix the problem for all browsers, including Privacy Browser. (Note, as pointed out in the comments below, this only works for all apps by default on Android < 7.0. For Android 7.0 and 7.1, this only works for apps that chose to trust user certificates.)
The following screenshots are from my Nexus 4, running Android 5.1.1 (API 21), but the process should be reasonably similar on other devices.
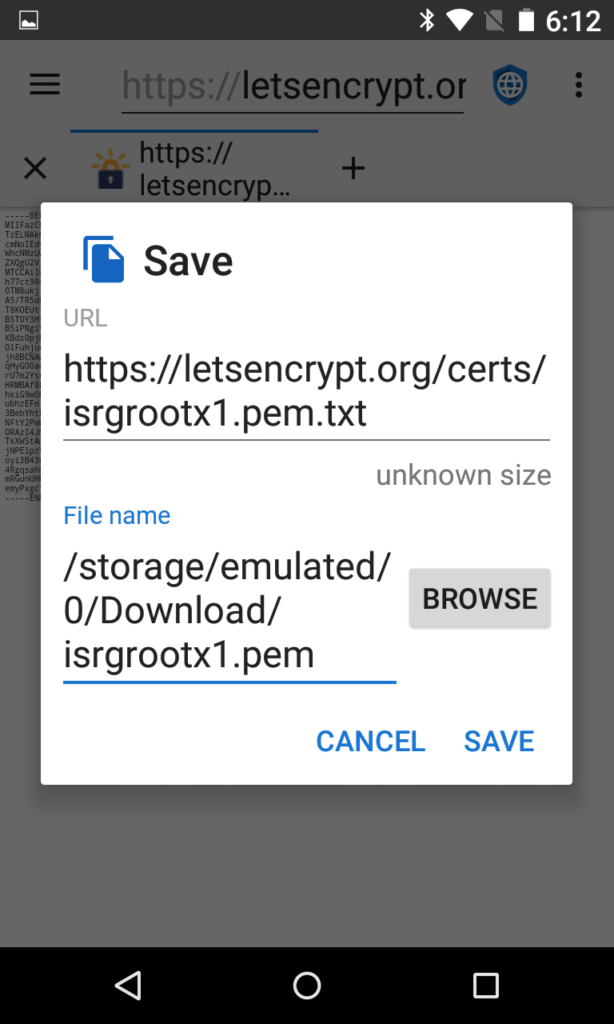
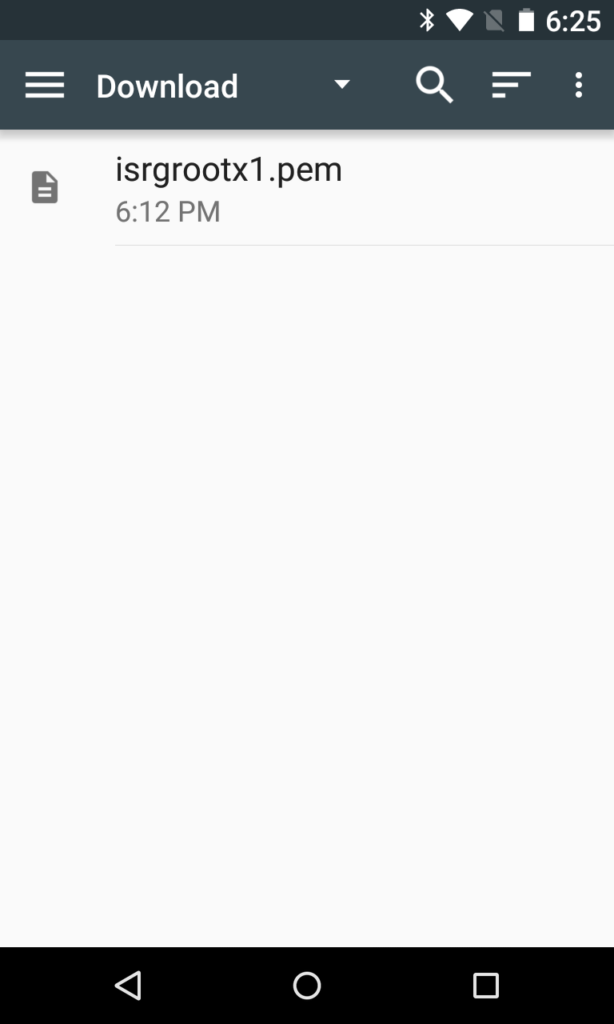
Download the ISRG Root X1 certificate to your device from Let’s Encrypt. You can do this from Privacy Browser by loading the link and then tapping Options > Page > Save > Save URL.

Android expects the file to end with a .pem. The default file name will be isrgrootx1.pem.txt, so you will need to change it to be something like isrgrootx1.pem.
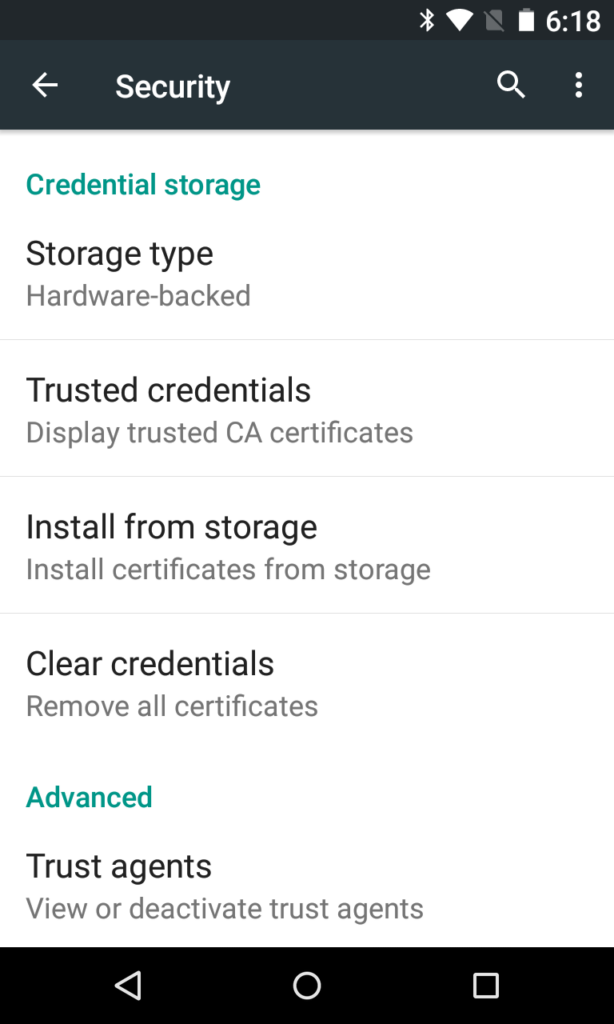
Navigate to the Android OS Settings > Security > Install Certificates From Storage.
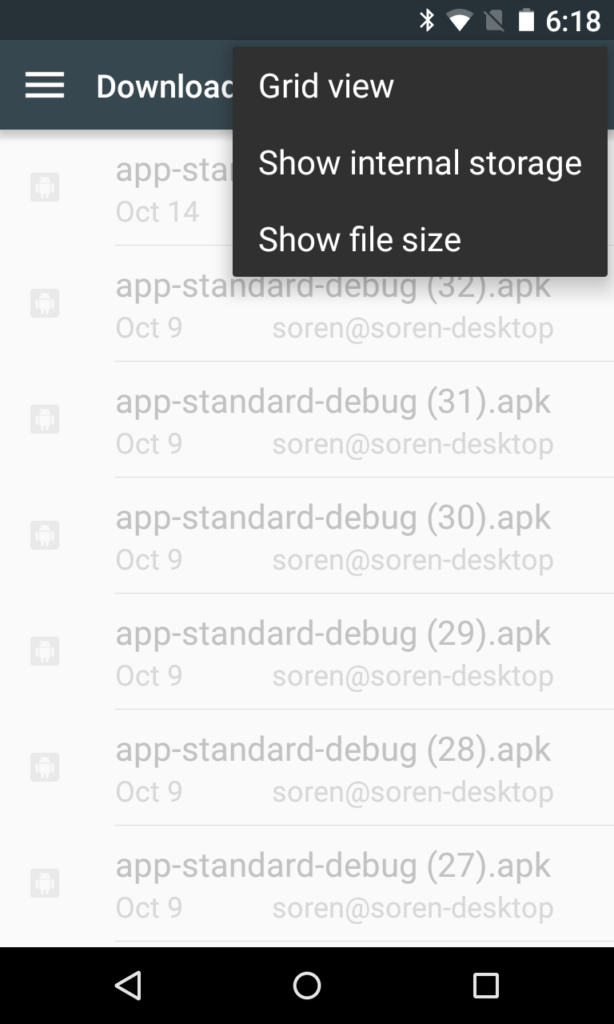
If not already enabled, tap Options > Show Internal Storage.
You now have an entry for Internal Storage in the navigation menu on the left. Why this isn’t enabled by default I will never understand. Also, why you can’t just use the Downloads folder entry that is also on the left I will also never understand. But for some reason, on certain versions of Android you cannot import it from there even though the file is listed. You must get it from Internal Storage. (Actually, I do know why, and it has to do with the Downloads entry not providing the real file name in the returned data, but rather a random serial number that is translated into the file name in a convoluted process. Whereas the Internal Storage interface just returns the true file name.)
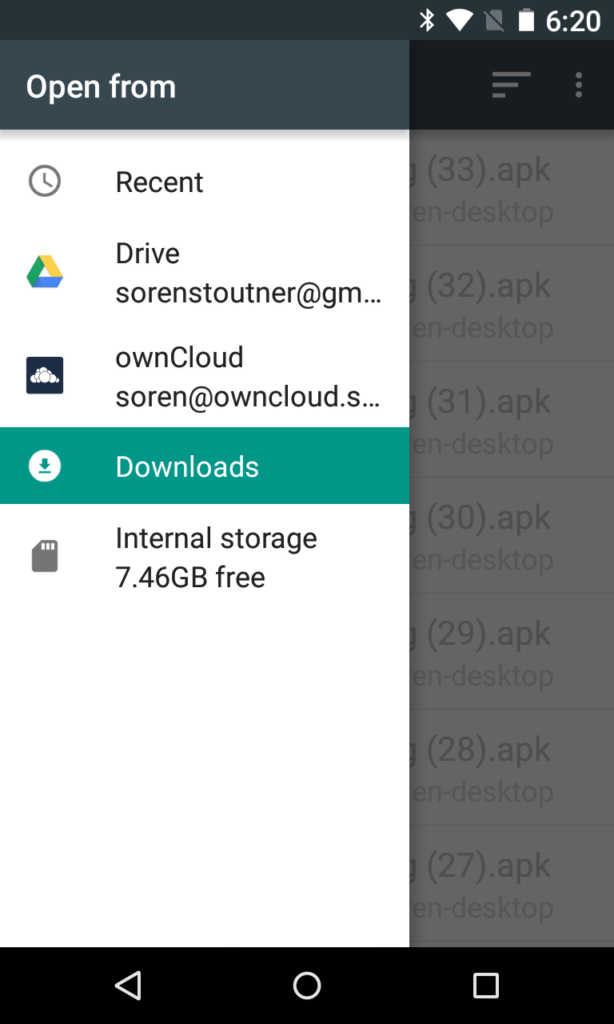
After choosing Internal Storage, select the Download folder.
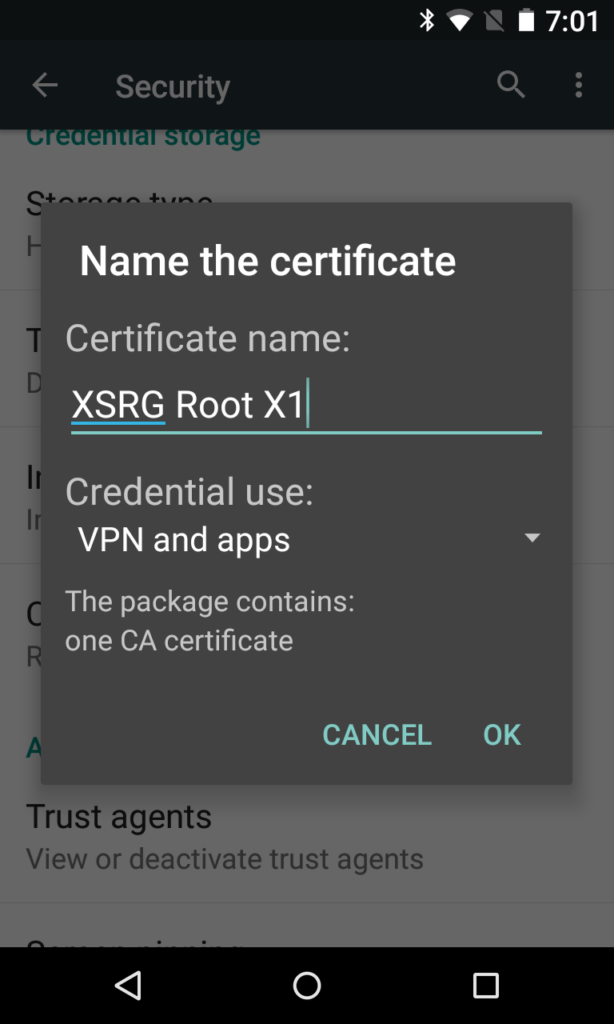
Name the certificate. The name is just for you to recognize, so it doesn’t matter what it is. (Also, Android, at least version 5.1.1, appears to completely ignore the name you chose and never displays it anywhere ever again.) Make sure the credential use is set to VPN and Apps, which should be selected as the default.
Android warns you that installing a compromised certificate authority is bad news. This message will pop up every time the device is rebooted. Luckily, Let’s Encrypt is fairly trustworthy.
Note that when you do this Android will force you to set a PIN, pattern, or password to unlock your device.
Let’s Encrypt has a test site you can use to check if the certificate is correctly installed.